Since I’ve joined the Minneapolis Modern Quilt Guild, I’ve made (or at least started) a lot more quilts. I’m constantly inspired by the people in the group and what they’re working on. I’ve also learned a lot of tricks and advice and I’d like to pass on some of that to you.
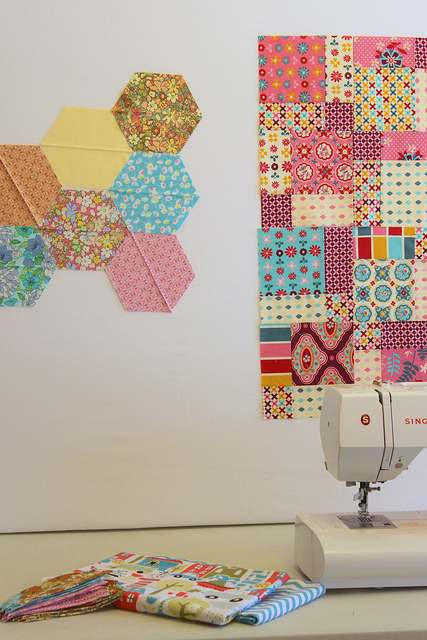
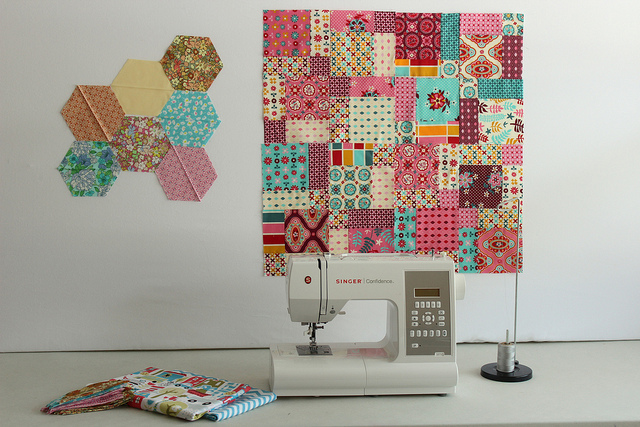
A design wall is a great tool for quilters to lay out the blocks you’re working on to make sure colors and patterns are balanced or to just help imagine what the final result will be. They vary from person to person in how they’re made. They are basically a piece of flannel fabric that you can use to lay out your blocks or fabric and stand back to get a good look at how it’s coming together and you can arrange or rearrange them as you like. The flannel fabric grabs hold of your cotton blocks and they just stick. The idea for this design wall came from a friend of mine (thanks Kristin!) and I love it!
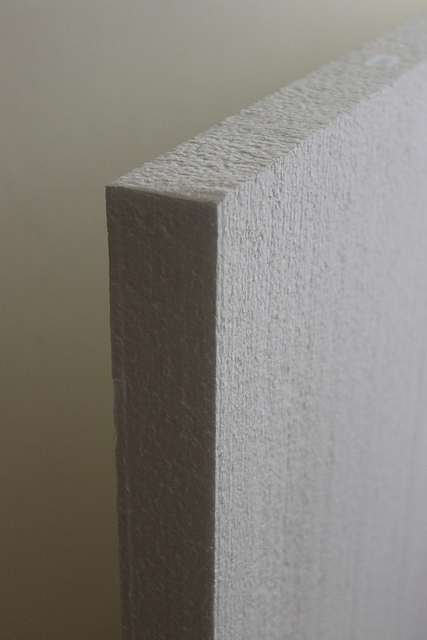
It’s very simple and inexpensive to make. I started with a large 4′ x 8′ piece of expanded polystyrene from the hardware store. I had a large space I wanted to cover for my design wall which is why mine is so big, but you can easily have it cut smaller to suit your needs. I used the 2″ thick piece which runs about $11. I choose this thickness, because it’s strong enough to handle moving it around if I need it and I can use normal sewing pins if I want to use my design wall as more of an inspiration wall and pin up sketches or notes for my latest project.
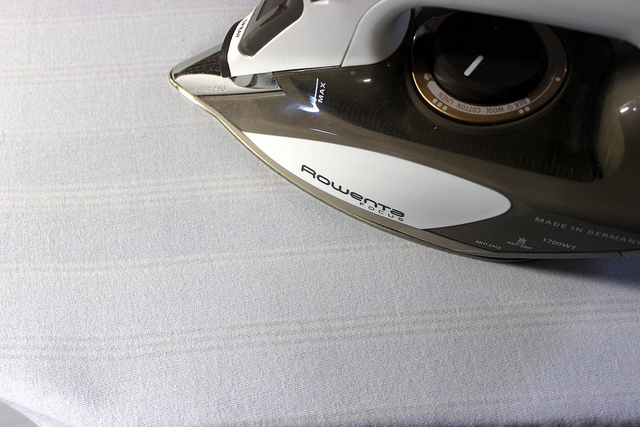
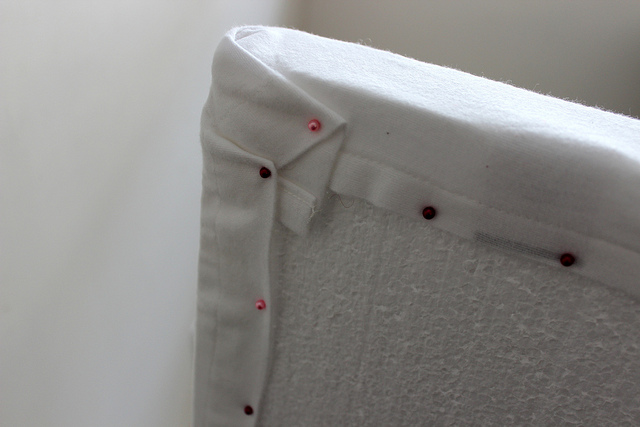
You cover the polystyrene with flannel fabric. The flannel will hold the fabric you place against it (without pins) while you’re working on your design – so that determining the layout of your blocks goes quickly and smoothly. The cheapest source of large flannel is just to purchase a sheet from Target, Ikea or a thrift store. White is best for viewing your designs, but any color would do. I pick up a set of Queen sized white flannel bed sheets for $17. I took out the fitted sheet and pillowcases for my bed and took the flat sheet for this project. Iron it well to get out all the wrinkles and creases.
To attach the flannel fabric, simply place the flannel down on the floor (right side facing the floor) and then place your polystyrene on top. Wrap the flannel around (like you recover a chair seat) and pin the flannel in place with sewing pins. My queen sized flat bed sheet was larger than what I needed. You can trim the excess, but I chose to leave the sheet intact so I can easily remove it for washing and it won’t fray since the ends are all still finished.
Hope you enjoy your design wall. I know I will.


I mounted my two (made this way, but with cheapo JoAnn flannel on sale) to the wall with double sided foam tape. Less portable, but I love it!
Thank you for sharing! That is awesome and now I plan to make one. What fabrics do you have up there on the right? Gorgeous!
Domestic Bliss by Liz Scott for Moda — they are pretty to look at! They may just have to stay up on the design wall for a bit.
I have been meaning to do one of these for a while – seeing yours might just have been the push I needed!. Great idea to use a sheet too.
What a great idea! Thank you so much! I am inspired again.