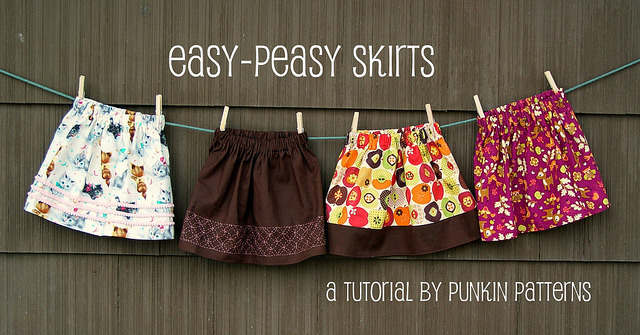
I have a lot of mom friends who don’t sew. I’m always surprised at their fear of sewing. So this tutorial is for all those mom’s who need a little help with an easy project — or for the seasoned sewer looking to use up some fabric from your stash!
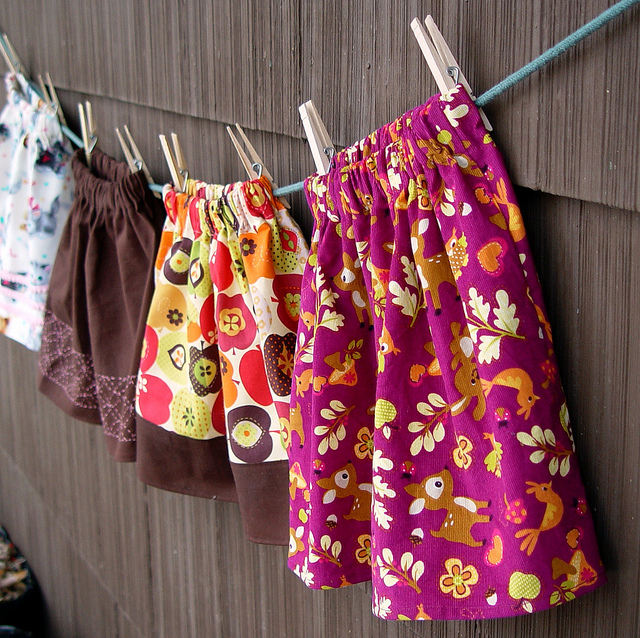
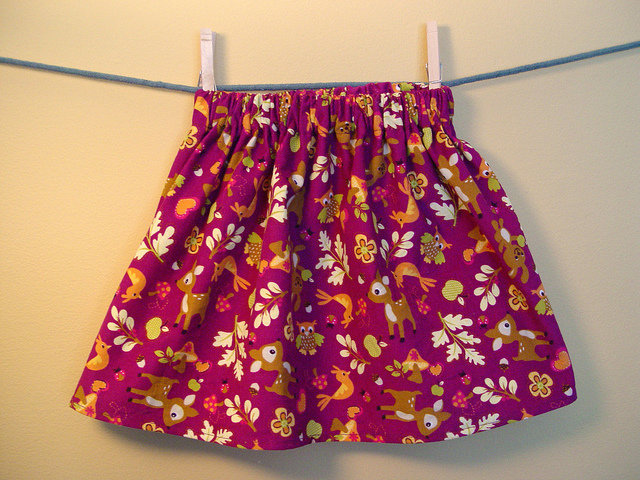
This simple skirt tutorial will work for any age (children through adults). The skirt is made from one (or two for the adult) pieces of fabric sewn together with an elastic waistband.
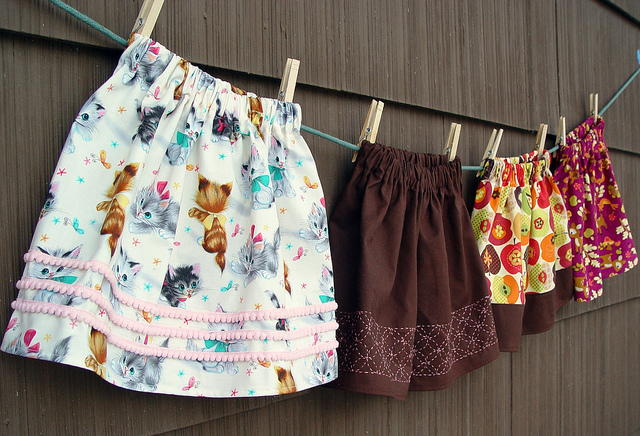
I’ll show a few examples of simple variations you can do, but there’s so many things you could do to make it unique! You could also try a patchwork skirt by simply sewing your leftover fabric together to make a larger piece.
Start by measuring the waist and length for your skirt. For my daughter, her waist measured 20″ around and from her waistline to just below the knee it was 13″. You can make your skirt any length you like, but I like it a little longer. To make it a nice full skirt we’ll double your waistline measurement (if you want it less full, multiply it by 1.5). To the desired length, add a total of 2.5″ (1/2″ for the bottom seam and 2″ for the top elastic casing).
So here’s the dimensions for your fabric piece.
If your desired width is wider than your fabric (most fabrics are 44″ wide), you can sew two pieces together.
I like to use 1″ wide elastic for these skirts. To determine the length of elastic you’ll need, start with the waist measurement and subtract one inch. This will hold your skirt in place nicely.
The Basic Easy-Peasy Skirt.
To make a basic skirt, start by sewing your fabric together to create your side seam. Start by putting your fabric right sides together and sew with a 1/2″ seam allowance (black line in the photo). Finish the edge with a serger or zig-zag stitch to prevent fraying (white stitches in the photo).
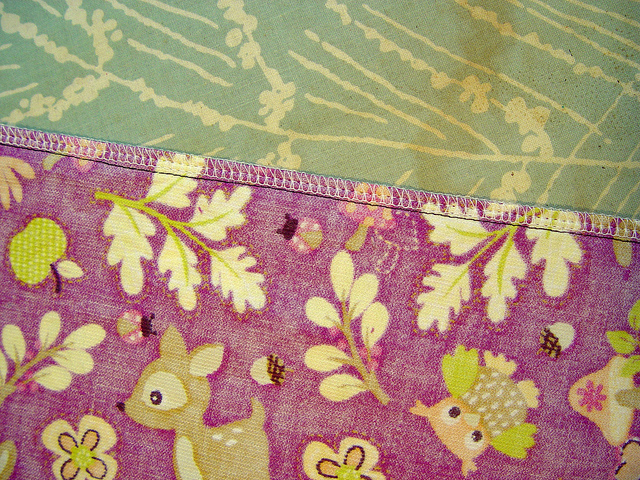
Alternatively, you can use a French Seam which will hide your raw edges and look very professional. This type of seam does not work well for thick fabrics. So if you’re using something thick, like corduroy or denim, you should use the method above. Quilting weight fabric is about the thickness I would ever use a french seam for.
To make a french seam, start with your fabric wrong sides together and sew with a 1/4″ (or less) seam allowance.
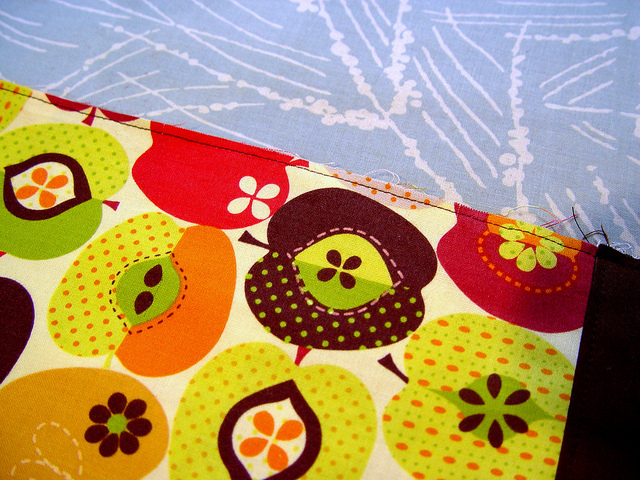
Turn the fabric and press your seam flat so that the right sides of the fabric are now together.
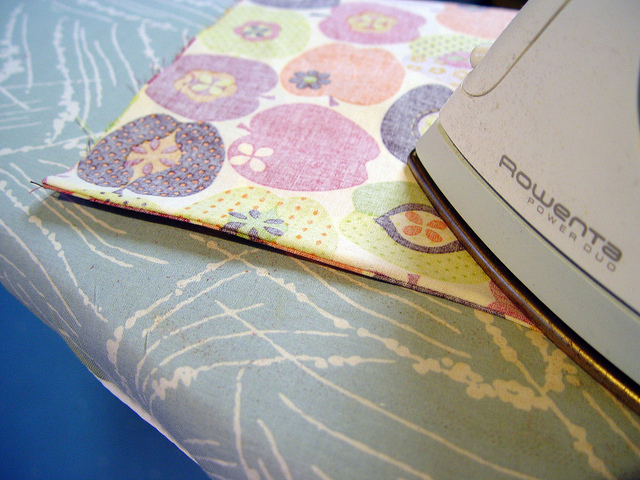
Sew along your seam with a 3/8″ seam allowance.
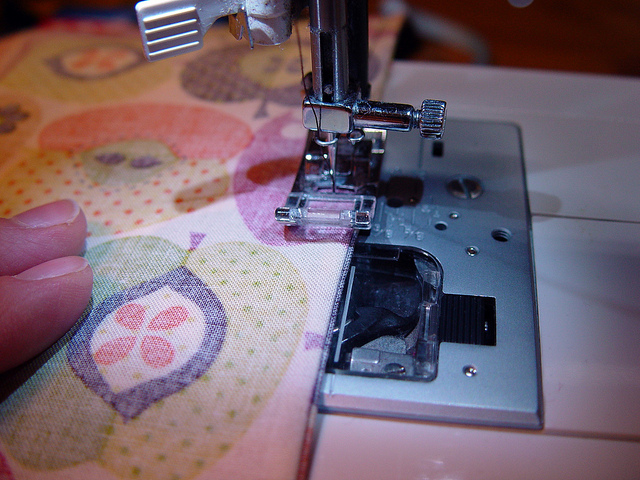
This catches the smaller seam and traps it inside – so your raw edges are completely encased. Iron your seam down flat against the fabric.
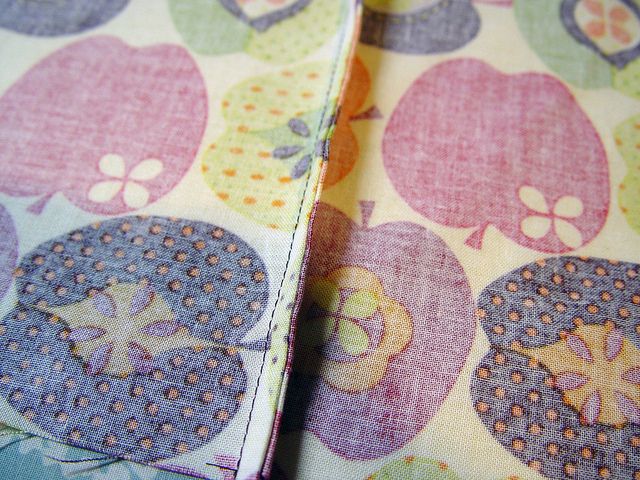
Hemming the bottom.
Fold the raw edge at the bottom of the skirt up 1/4″. Press. Fold up an additional 1/4″ and press.
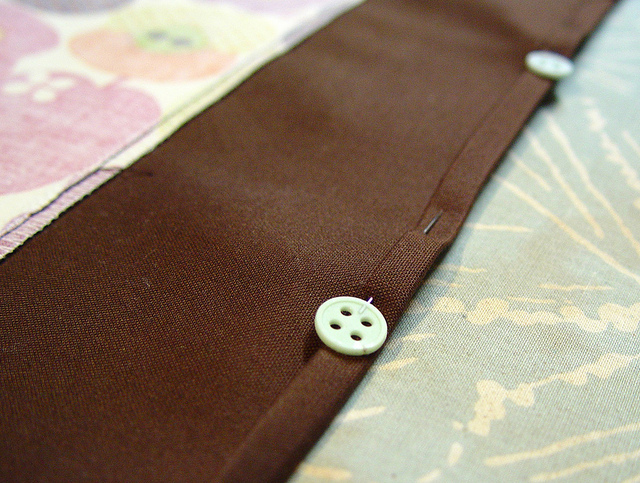
Pin in place and sew in place with a seam close to the upper edge of the fold.
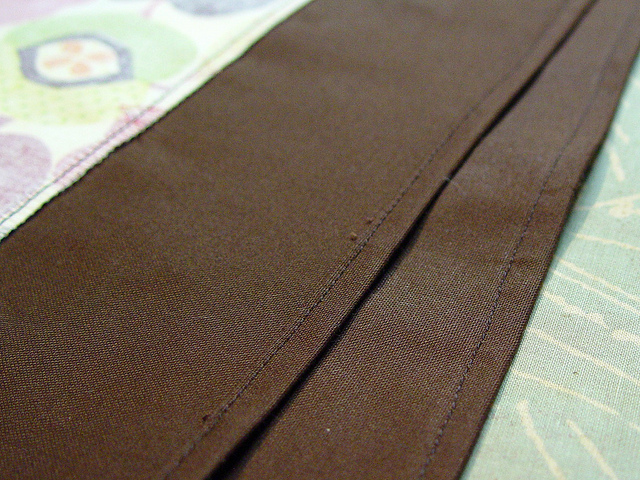
Finish the top.
To make the casing for your elastic, fold down the top edge 1/2″ and iron in place. Fold down again 1.5″ and iron. Pin in place. (If you’re using elastic other than 1″ wide, you’ll need to adjust this size by adding 1/2″ to the width of your elastic. So if you’re elastic is only 1/2″ wide, add 1/2″ and then your second fold would be 1″, not 1.5″.)
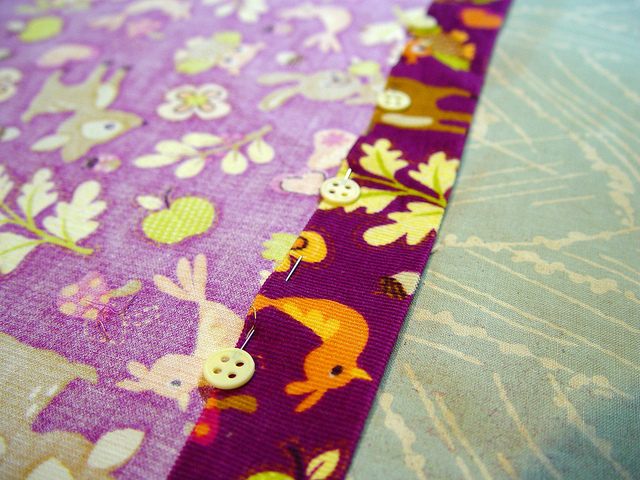
Sew around 1/4″ from the bottom of the folded edge leaving an opening of about 3 or 4 inches unstitched.
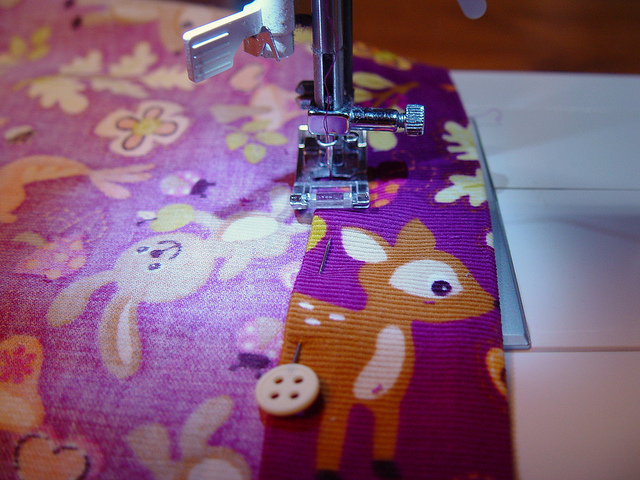
Place a safety pin at one end of the elastic and start feeding it through the hole you left in the casing.
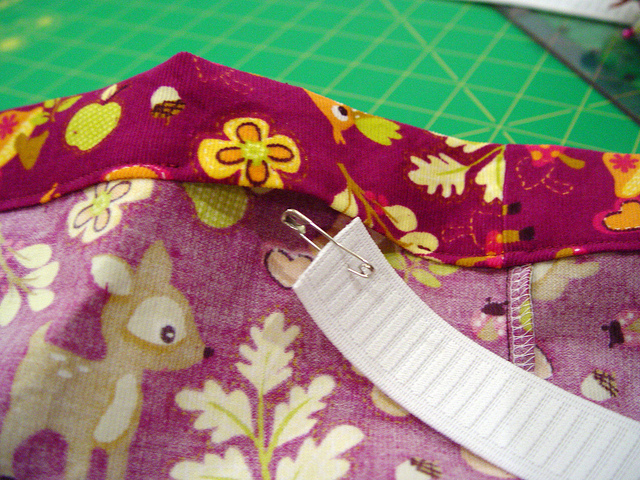
When you’ve gotten the elastic all the way through the casing, pin the two ends of the elastic together with a 1″ overlap.
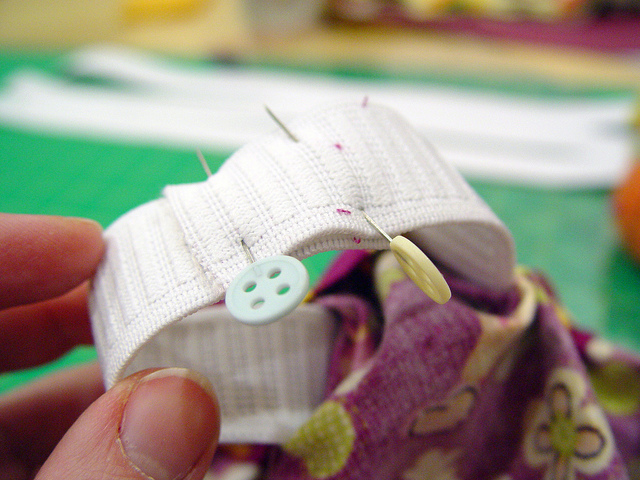
Sew in place.
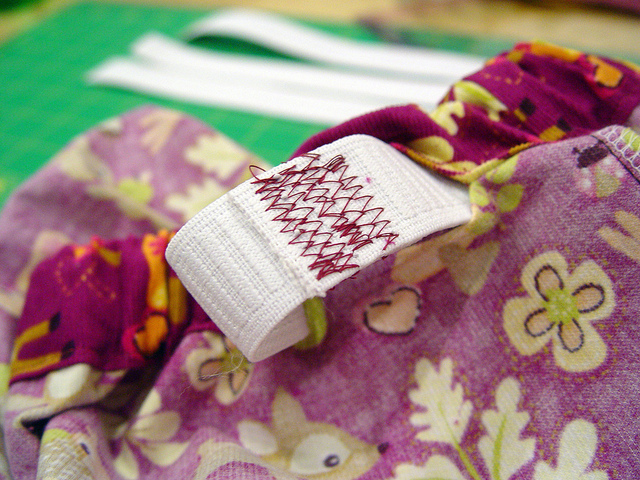
Tuck the elastic into the casing and pin.
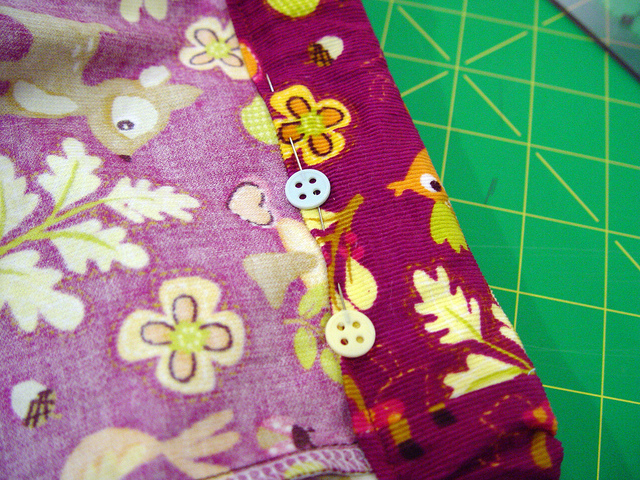
Sew seam closed and you’re done with the basic skirt!
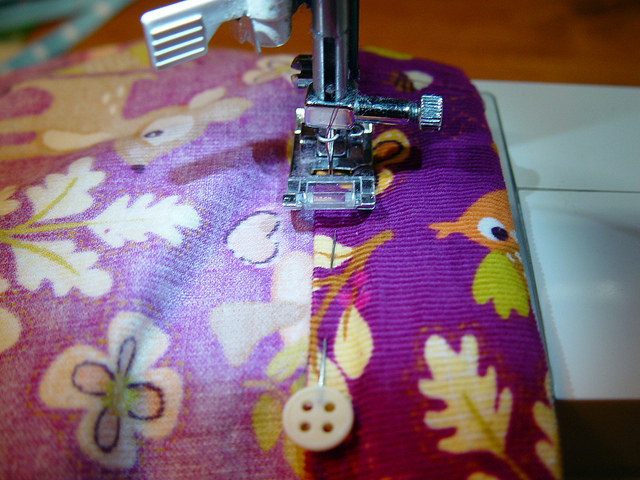
Variations:
Add a little bling!
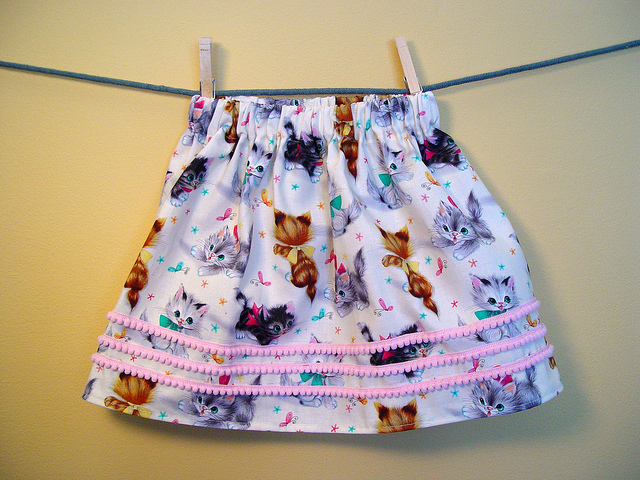
One of the simplest ways to add a unique touch to your skirt is to add some trim (or bling) to the bottom of the skirt. You could add lace or ribbon or little tiny pompoms like these!
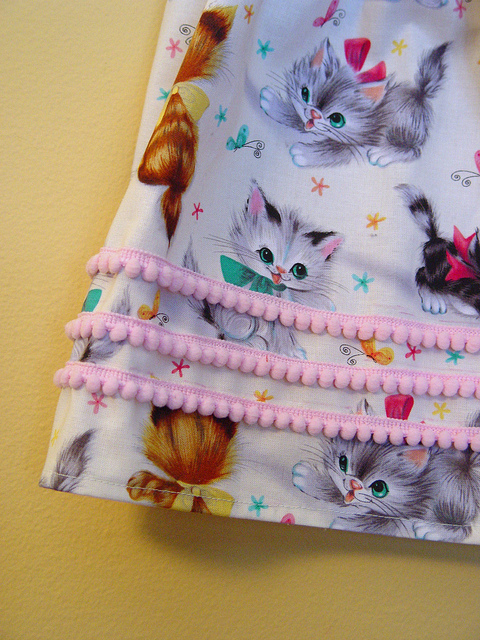
I added the pompoms before I did the side seam, when the fabric was flat so that the ends of the trim are hidden in the side seam.
Add a simple stripe.
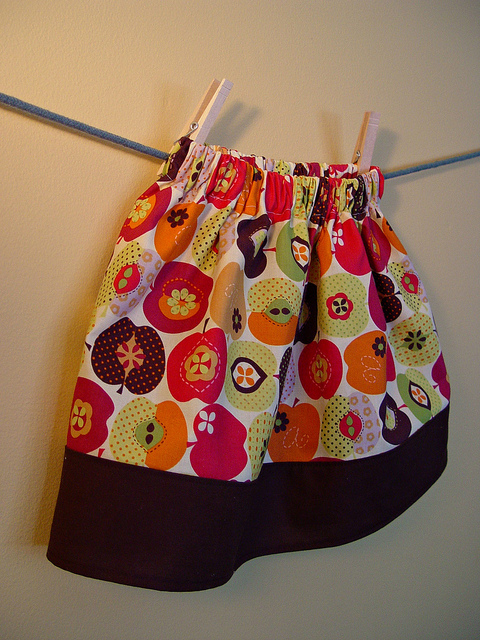
To add a stripe at the bottom, determine your stripe width (I added a 3″ stripe at the bottom) and subtract that length from your top half piece and add 1/2″ to the length of the top piece and add 1″ to the length of your desired stripe.
Place your stripe fabric and top fabric right sides together and sew with a 1/2″ seam allowance.
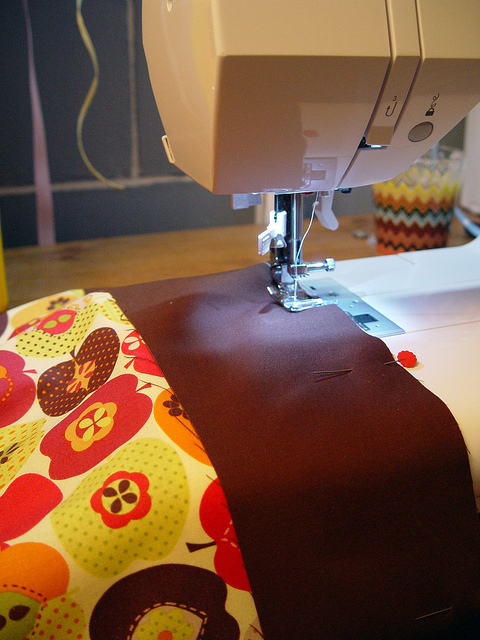
Finish the edge of the seam by serging or using a zig-zag.
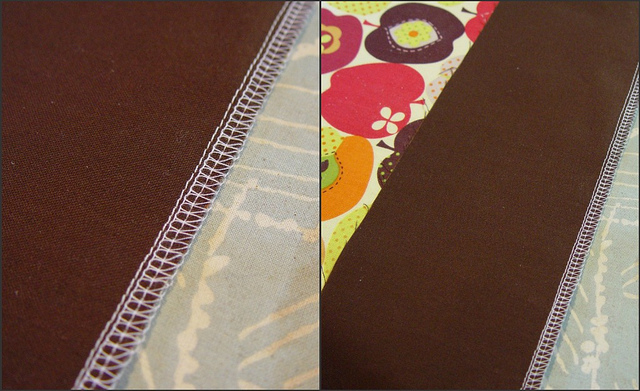
Iron the seam down (towards the stripe). Photo shows the opposite way.
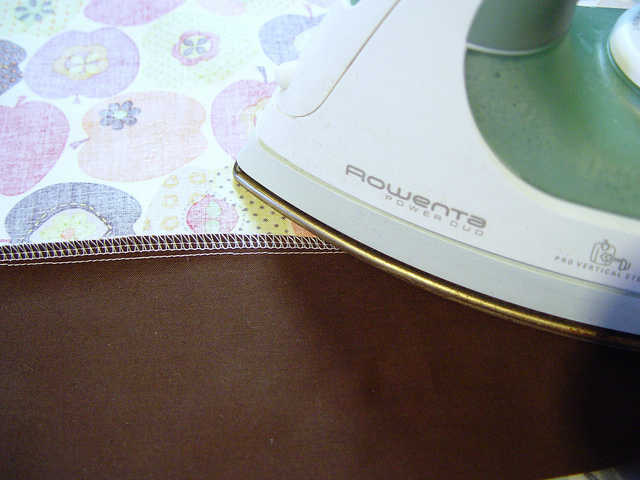
and topstitch in place.
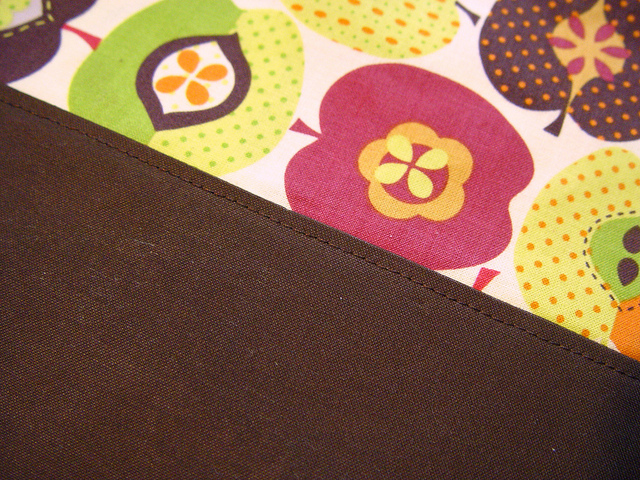
Continue sewing the skirt stitching the side seam next and then finishing the bottom and top.
Adding some embroidery.
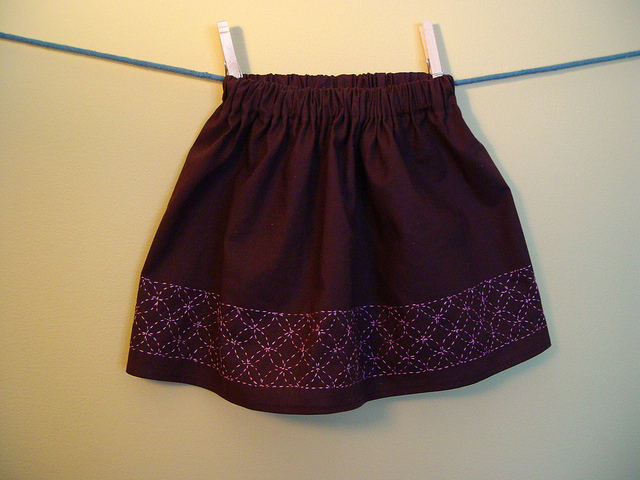
Lastly you can add beauty to simple, plain fabric by adding a bit of embroidery. Here I used Sashiko a type of Japanese embroidery which is simply a series of small, evenly spaced running stitches sewn in repeating simple geometric designs.
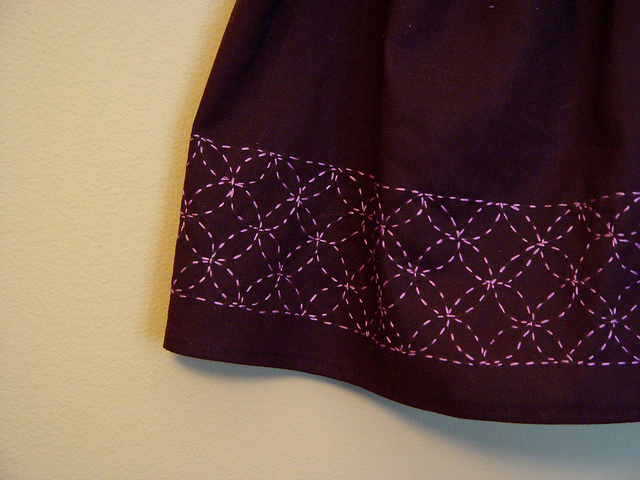
The stitch I’ve used here is a variation of Seven Treasures where two rows of the stitches are made and
horizontal lines were stitched above and below to encase it. To add the design, I made a small sketch of the design on paper and sandwiched it with carbon paper against the fabric. I traced the design leaving the impression on the fabric. I repeated this all the way around the fabric. Then I started stitching. It took a little while (after all the full width of the skirt is 40″), but I love it!
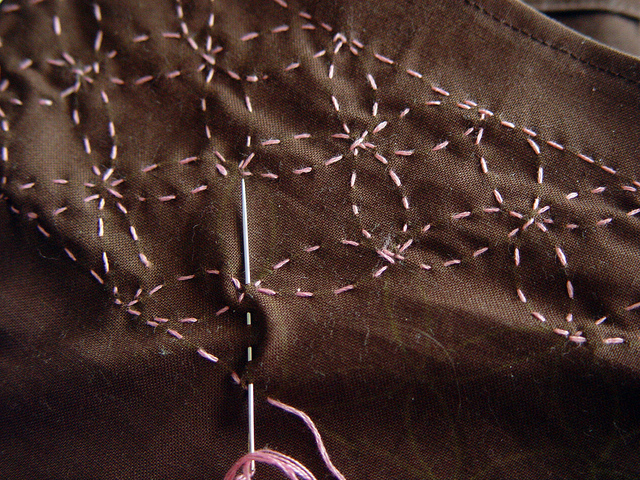
I added the embroidery before I added the elastic, but after the bottom hem was stitched. Of course you could do something much simpler — a simple running stitch around the skirt or a flower or two poking up from the bottom!
Let me know if you have any questions and Happy Sewing!!


Thank you for such an awesome tutorial! I can’t wait to try one!
Fantastic, and so easy! I’m looking forward to making lots of skirts like these as my Newbie grows up.
Extremely cute! But I was actually eyeing your adoreable stick pins with the button heads. Where did you get those??
Hi- I made one of these skirts and it’s come out quite well but I’m still a little unsure on adding the elastic- do I close both side seams up first and then case the elastic? Also is there any place on the skirt that is good to leave the gap for the elastic- i.e. near the side seam? Thanks
Yes, close the side seams before making the casing for the elastic. I like to leave my opening for the casing near the side seam, but it really doesn’t matter. Let me know if you have any more questions!
Sweet skirts – that sashiko embroidery looks lovely along the skirt edge
After a careless comment alluding to a newfound desire to take up sewing my gadget obsessed hubby furnished me with a lovely new sewing machine that has been languishing in the basement for near 7 months, it’s only outing being to hem a pair of jeans. Now, with your clearly laid out step by step instructions along with pictures of the whole process, which I love, I really think even I might manage to realize some small tip of my sewing desires! Thank you so much. These are the best tutorials I have ever seen. I am so excited and so are my 2 daughters.
Thanks so much for your lovely comment. I’d love to see pictures when you’re done!
Hello ! I would like to know , what fabric did you use to make your skirts ?
The solid brown is just KONA in chocolate. The purple animal corduroy print came from Jo-Ann. I don’t think they carry the exact one anymore, but something really close to it. The Apple print is from Timeless Treasures Fabric, pattern APPLE-C. Finally the kitten one — from Michale Miller, which I purchase here: (http://www.shopcraftyplanet.com/products/Kitties-%252d-Cream.html) — also got the mini pompoms from crafty planet too.
One of the best tutorials I’ve seen. I’m a beginner and I think your directions are very clear. Thank you.
Thank you so much! I, a poor college student and fashionista, am so excited to find this! I am going to make so many unique one-of-a-kind and (hopefully) inexpensive skirts! THANK YOU!!!!!
When I was young I made everything I wore but now I haven’t sewn in years. This great tut has inspired me. I think I’ll have to make some of these for my beautiful little grandnieces! Good job on the tut, thank you for sharing!
Thanks so much for this great tutorial! I just bought a sewing machine and undertook your easy-peasy skirt as my first project! I made a few mistakes and learned a ton, but overall I am really happy with my first creation 🙂
Thanks for taking the time to help beginners like me accomplish something easy that builds confidence for the more challenging projects to come!
Hi Vanessa! I feel VERY silly, b/c this seems like a really dumb question: Once you’ve determined your measurements and purchased the fabric, how do you cut out the shape of the skirt? Is there a pattern available that I just can’t find? In other words, I understand that the measurement across the waistband should be the waist size x2, but how wide should the bottom be?
Thanks so much for putting this together! I’m a beginner, and after reading your tutorial I can’t wait to get started. 🙂
Carrie Moore
There’s no pattern. The skirt piece is a large rectangle. So the bottom of the skirt is also 2x waist size. When you add the elastic to the top to gather the skirt, this gives it shape. The bottom of the skirt remains the same size as you start with, i.e. 2x waist size.
Let me know if you have any more questions.
Vanessa
Whoa! Too easy to be true! 🙂 Thanks so much; most especially for not making me feel like the mo-mo I am… *grin*
Thank you for commenting here about the pieces actually being a large rectangle. I was confused about the same thing. <3
I also had the same question so thanks for asking it!
Hi Vanessa….I just found your blog today when looking for toddler skirt tutorials. I followed your pattern and made the cutest little skirt for my 2 1/2 year old. I have never made any sort of clothing for her before, so I’m super excited that it turned out well. Tomorrow I’m going to make a matching one for my 15 month old. Thanks so much for the great tutorial!! Jen
Thank you thank you thank you!
My daughter just turned 17 months old and I was able to make her the most adorable Ladybug costume for Halloween this morning, thanks to your tutorial. Your instructions and photographs were FANTASTIC! I havent touched a sewing machine since Home Ec (15+ years ago)but I felt this strong urge to make her costume myself and your instructions couldnt have been any easier. We have a family gathering tomorrow and I plan to bring my lil Ladybug in her new skirt.
Thanks for making Mommy’s first Halloween costume a huge success!
~Lindsay
thank you! thank you! thank you! these skirts are just what i needed! these are so easy to make and are super cute! im such a mess when it comes to sewing! and you saved the day! thank you!
Simple and efficient ! I love it !!!!
Thanks so much for sharing!!!!
I am not a sewer, but managed to whip up a little Christmas skirt for my 6mth old daughter in under an hour. I’m looking forward to trying it again with different materials as she grows. 🙂
just bought some gorgeous fabric with multicoloured elephants, going to make one of these for my 1 year old!
Hi,
I booked marked your skirt tutorial. I have since made 3 skirts for my 5 year old and a skirt each for two of her friends. I am just beginning to sew. Prior to the skirts I had only made placemats and napkins!
Thanks for the easy to follow tutorial. I am sticking to the basic seam but hope to master the french one soon.
Excellent work! This was such an easy tutorial to follow. Thanks!
Thanks for the measurements! It will make my skirt making adventures this afternoon much easier! And I don’t have to purchase a pattern. 🙂 Yay!
Had to make an emergency birthday present this morning – whipped one of these up in 45 mins! What a life saver, thanks!
PERFECT…!!!
A friend has asked me to make a pimple pull-on skirt for her daughter & this will be my perfect pattern.
Thank you…
Jo. xx
Wooww!!!
I love this perfect skirt!!!
I made one and it’s my first piece of clothing that I made. I just stayed at the basic kind off skirt because my fabric was really busy. Thank you!!!!
xxDoris
Hi, I just found your blog tonight and am a new follower on GFC. I have been looking for a very basic sewing tutorial for a skirt for my daughter (almost 5). The most basic one here is exactly what I wanted and you’ve even done it in corduroy which is what I will be using. I’m so excited to whip up some little skirts for her. Thanks for the tutorial. I’m really looking forward to reading more of your blog. 🙂
Jennifer
http://thistlebearhome.blogspot.com
You have been featured on a +30 little girls skirt round up- thanks for your great tutorial! http://www.patchworkposse.com/2013/07/30-elastic-waist-skirt-tutorials-little-girl-summer-skirts/
Thank you so much for this tutorial! I just made a skirt today for my 6 year old daughter and it turned out great. It was a trial run for a skirt I will make for part of her Swedish costume. Thank you thank you!
Silly question…. is the elastic measured at the waist length + 1/2″ for the overlap?
Elastic is measurement of waist minus 1 inch
This comment has been removed by the author.
thank you so much for the great tutorial.. got so many ideas… am gonna make one for my friends daughter..
Is there anyway to make this skirt fuller? My granddaughter wants a “poofy” long skirt.
Thank you so much for this! I knew I could figure out a skirt on my own but I’m still pretty new to sewing and this was SO much easier. My two-year-old adores “twirly skirts” and has been loving picking out fabric for me to make more for her! The two I’ve made so far have turned out great and took an amazingly short time to whip up.
Your blog is really helps for my search and amazingly it was on my searching criteria.. Thanks a lot.
modest clothing for women & Long Skirts
Yeah, I also heard from my neighbor that we can buy Brandy Melville Skirts and shorts from online stores at discounted prices. I really want to know from where I can get discount on these skirts?
Wonderful skirts! And brilliant with no pattern.There are loads of tutorials like this on the web (I know coz I must have looked at them all!) but yours is absolutely the clearest! LOVE your embroidery. Couldn’t possibly do this myself!
I have just one question – Would you just cut your fabric piece as it comes off the roll or cut on the bias?
YAY! I just made my 2 year old daughter the CUTEST little skirt using your tutorial, thank you! This is the first time i’ve sewed in 20 years, I’m so happy. I’m recovering from an accident and I need something to focus on thats not too taxing – this is perfect. I’m now eyeing my husbands old shirts and thinking I can convert them into rather nice skirts…. oh-oh…
Thank you so much for such a clear tutorial. I have just made my first skirt for my friend’s daughter who has just turned one. I used a navy cotton fabric with little strawberries on and it looks adorable. I tried it on my 9 month old son for size and it looks great! ha ha. 🙂
Many thanks for this adorable and clear sewing pattern! I’m teaching a young one how to sew tomorrow morning and this’ll be a great project to work towards!!!
Thank you for this easy tutorial! With your help I managed to sew a cute skirt for my baby niece and I’m so happy that everything went just fine and I didn’t ruined the fabric (I have almost 0 experience in sewing).
Please what is the measurement of the elastic.
Just used this lovely blog post to create my first skirt! Lovely to follow, can’t wait to do more! Xx
What a great way for a beginner to make something wearable!! I rarely sew anymore, but whipped up 2 of these in one afternoon. (Wish I could post a photo – so cute!!) Thanks for the detailed instructions and helpful photos – I plan to make more!
Hi! So when making this skirt, after you have determined your width, do you then cut the fabric in half and sew two rectangles together? For example, if waist size is 20″, total fabric width should be 40″. Do I cut two 20″ pieces and make two side seams?
Thanks!
Hi Kristin! You can do it either way. If you want to add pockets (https://www.punkinpatterns.com/blog/2012/05/easy-peasy-skirt-with-pockets.html), you will definitely want to pieces. Just make sure to add another seam allowance to the piece if you decide to cut it into two. Let me know if you have any more questions. -V
Brilliant! I’ve just made one in 1.5hrs for my granddaughter, i haven’t sewn for years!! Thank you
Hi I love this but don’t quite understand the elastic casing part. Why does it need to be folded down twice? Isn’t once enough? Thanks!
Folding it twice hides the raw edge so it won’t unravel. You can also finish the raw edge by serging it or using a zig zag stitch and then fold the casing once.
Thanks for the tip on the French seam! I haven’t sewn clothes in almost 10 years; I have been craft sewing, but my daughter starts kindergarten in a couple of weeks and I thought it would be fun to make her some one-of-a-kind play skirts to wear at school. I have two down, and I will probably whip out a few more today. Great easy tutorial that kept me from bothering with buying a pattern.
Hi,
I just found your article and I’m about to try my hand in sewing. I find it so easy with your tutorial! I so excited!
Thanks!
Wow, thanks for sharing this – I used this pattern for my first sewing machine make (eek!) and it came out pretty well. I wrote it up on my blog here:
http://musingsandmakings.com/baby/learning-to-sew-little-skirt-with-punkin-patterns/
Just brought my 10 yo daughter her first sewing machine and used your tutorial to get her to sew her first skirt. She did great with only a little help from mum
Yay! So glad! Thanks for sharing. -Vanessa
I found your site today and have made this skirt in just a couple hours and it turned out brilliantly! You have made it so easy and as my first ever attempt at making clothing (aside from pajama pants when I was in school 13 years ago 😉 I have the most adorable skirt for my 3 year old now that I am proud to have her show off! And I let her pick out the fabric which has owls and she is obsessed with it, I know she will love it! I even had the courage to add some sequin ribbon to the bottom hem! So cute! Thank you so much!
So happy your first skirt was a success! Happy sewing! -Vanessa
Bookmarked this page when I was looking at sewing projects, my husband bought me a sewing machine for christmas to get me back into the groove of things, I was so excited when I found a duvet set I had bought last year to use for Material, so last night I went to making my first item since high school, and it came out great, so simple and she loves it, now wants me to make her Dolly one, so thank you for this easy way on how to make it, sure Ill be making loads more 🙂
Gorgeous collection of skits you have. I really love this.
Thanks for the instructions. Can’t wait to make some of these skirts as I have lots of fabric to use up.
Your instructions are so clear, thank you!
Thank you for this, it’s a fantastic tutorial and I loved making the skirt (first skirt I have ever made!), however in mine the fabric around the elastic isn’t as raffled up! It’s literally straight… what am I doing wrong? I’m pretty sure the measurements are correct but I feel like I’m missing the trick! ! Thanks
The ruffling on the skirt comes from the extra fabric you have around the body which is why you have it 2x the waist measurement. If you want a fuller skirt, just increase the amount of fabric for the width.
This is exactly what I was looking for and it worked out great! Thank you so much for the really really helpful tutorial – perfect!
Wow…amazing! I’m new to sewing and was looking for a simple skirt to start with…it’s amazing! Definitelt making one for myself this afternoon! Very well written and clear…..THANK YOU!
So cute- can you tell me where to find the embroidery pattern?
I drew the pattern on with chalk. It’s modeled after a variation on Seven Wonders (Sashiko)
Thanks for sharing this tutorial. I just helped my 11 year old granddaughter make this. I think she is now hooked on sewing.
Yay! So glad!
Love this tutorial! I made a sweet Minnie Mouse inspired skirt for our recent trip to Disney World. My sweet girl looked adorable. Thanks for sharing!
http://mymommacan.com/disney-world-outfit/
Thanks for this! French seam part especially clear and useful. Thrilled with the little skirt I’ve made
Thank you so much. Great tutorial! I am new to sewing and I just made my 5mo daughter this with a Christmas fabric in about an hour! I was so proud. Now to make myself a matching one! Thanks so much so excited going to make us a whole summer wardrobe!! Love love love! God bless you.
If I use 100% cotton fabric like what you would quilt with, should I use a backing or double it back or should it be okay?
You can use quilting fabric alone for the skirt. If it’s a light color or transparent, you might need a liner.
Hey! I’m going to give this skirt a go tomorrow! I was wondering about the length of elastic, is it the measurement of waist before or after doubling it for length of material? I’m guessing before I don’t want to waste elastic 🙂
Thanks!
thank you for sharing your ideas – I felt inspired and made my daughter 3 skirts this morning 🙂
Lovely and clear tutorial for a very busy and tired mum of 20 months old toddlers! Little Emily will now have plenty of cute little skirts – maybe I will also find as easy tutorial as yours for Elias’ trousers. Double thank you! 🙂
Thank You! A great present for my seven year old granddaughter.
I made this today with Curious George cotton, and a daisy cotton trimmon bottom. Turned out perfect! Thanks so much.
Hi. Have you used the same idea to make a lined skirt? If so, would you use the same amount of lining fabric as the main material and join them at the top with the elastic casing? Thanks 🙂
Hi! I found your tutorial while looking for a starter skirt to sew. I have a question for you. Where did you get that adorable dark pink fawn fabric? It is so cute…… Thanks,
Maria
I know this post is a number of years old, but I am using this to make my first item of clothing on my sewing machine. All going well I can make one for my 3 year old niece too 😀 Thank you for such easy instructions, I can’t wait to get started now!
I’ve already made a few of these, they are coming out beautifully.My next one will be the stipe at the bottom. This is a great tutorial and yes, easy-peasy . . . thank you so very much!
Oops, I meant “stripe at the bottom”.
This skirt is so cute and easy!! I am just a beginner and I did not have any trouble at all reading the directions. The pictures are very clear and I had so much fun making these for my daughters! Thank you so much!!
I have made 6 skirts so far, and quite a few more in the process. I love them!!
Thank you for this tutorial.
I just finished a pillowcase dress for my granddaughter and have enough fabric left to make a little skirt with a contrast border. Thanks so much for this easy project.
So many thanks to you for this tutorial! I was looking for an easy skirt pattern to use to make skirts for a charity organization that serves girls in Africa. This pattern will certainly do the trick.
I have never sewn an item of clothing in my life nor used a sewing machine – until today. I bought a simple machine at Walmart today at 1:30, brought it home and went through the Quick Start guide, began sewing using this tutorial at 2:30 (I had already measured my kid) and had a finished skirt at 4:00pm. You are amazing!!!! I am so excited!! Thank you for this. This is the start of something big for my family.
So happy I could be a part of your sewing journey!
What a great tutorial! I’m forever grateful! I was tasked to get a ” black skirt, no denim, which reaches past the knee while seated”…..for my 10 yr old daughter’s first orchestra appearance. Ultra conservative! No shop here in Ireland would sell you that. Maybe in a big country like the US it’s different. Nobody would put that kind of stuff on their poor child. So I went about making it myself. And despite my poor sewing skills it was a success! If I can do it anyone can! Many thanks.
Thank you for such a brilliant and simple tutorial. Have made two skirts for my daughter (one yesterday evening, one this afternoon) and both mum and daughter are very happy! There will be more!